How to Make Cool Bracelets and Jewelry Making Instructions For a Brooch

How to make cool bracelets even if you are not so "cool"! If you have thought about a great new hobby and maybe cool bracelets have come to mind, maybe you will want to read on. Years ago I met an elderly antique dealer in upper state New York at an antique show.

Soldering Equipment

I looked over her wares and fell in love with the little parts and pieces she had to make jewelry out of. Ever since then I have been making brooches, bracelets and necklaces out of these parts I purchased from her. Just the process of finding pieces and then creating an piece of art out of them is very rewarding and can put the fun and joy back into your life.
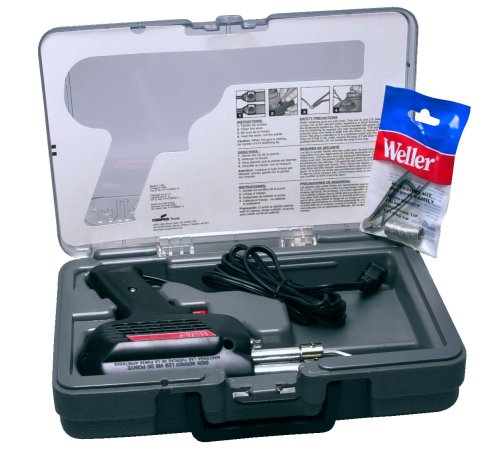
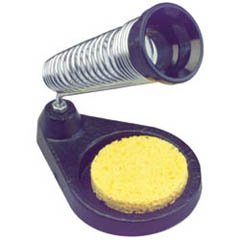
Soldering Equipment

A few pointers I would like to share with you have changed the process into an easier one for me. If you can, buy a good set of jewelry tools. My first set I got at Sears and they were fine for a beginner but I needed sturdier pliers. I bought a wonderful German set and they have lasted me over 15 years. You can find these at jewelry tool websites.

The next tip is unless you can solder your pieces together you will need the proper glue. I highly endorse a glue called "GOOP" or E-6000. This is the same glue by a different brand name and it stays put for well over 20 years. I think you will probably get bored with your pieces before then, but even so you can re-glue them for another 20 years. This glue takes a little getting used to, but it is the one to use. I tried super glue...it fell apart, two part epoxy, it fell apart too.

If you like to make bracelets I would offer this tip also. It's fun to make charm bracelets and add your special pieces to it. You could solder a ring onto a piece or you could glue those special pieces onto something with a ring and then attach it to the bracelet. The rings, and this is very important, must be sturdy enough and must be closed properly. You must open the ring and slide on the charm, slide the ring through the sturdy chain bracelet and the close the ring together so that no gaps are in the ring. If you leave a gap in the ring this may snag on clothing and pull the ring apart.

If you have a nearby jeweler with a torch you could have him solder your charm creation on to the bracelet. I have another option also, you could also use a split ring. This is a ring that already overlapped and you slide your charm onto it and then slide it onto your bracelet and no gap is present to be concerned about. No soldering is needed. I hope this helped some...it is so much fun to make brooches too.

Collecting little vintage pieces is fun and you could make some gorgeous vintage brooches for yourself and friends too. I would offer this little tip to you. Buy a good sturdy base piece and then pile on your collection. Use a good sturdy clasp back and use the E6000 glue to secure it. So much fun. Enjoy and I'll be back for more hints on how to make cool bracelets and ideas for settings findings and jewelry ideas.

How to Make Cool Bracelets and Jewelry Making Instructions For a Brooch
Soldering Equipment

Hp Slate Tablet Drill 18V Tvs Samsung

Antique Metalware Restoration - Tools Needed To Do a Good Job of It

Although there are many metal objects within the home, they tend to be replaced rather than restored or repaired once they become damaged. This is not so with antiques or decorative objects. There is no reason why metal work restoration should not be approached by the amateur providing it is approached in a systematic manner.

Soldering Equipment

The average person treats metal as a totally alien material. It can, however, do most things if treated in the correct fashion. The main thing to remember is that any action you take against it tends to be fairly permanent. The approach to metal working has to be thorough and methodical. However, that is not to say there is only one way to achieve your objectives.

Soldering Equipment

This article will discuss some of the common tools used in antique metal work restoration, and hopefully after reading the article, you will be able to restore your own pieces with an added degree of confidence.

1) A small vice is ideal for holding a piece securely while it is being repaired. Vices come in all price ranges and can be either dis-mountable or permanently fixed to the bench. The type which has a swivel head is a great help in getting at awkward angles. Make sure that the type you choose is fitted with soft jaws which will not damage the work.

2) A gas torch is invaluable as a source of heat for soldering and for loosening jammed parts. If more than the occasional repair is to be attempted, a torch with a separate gas tank will prove to be an excellent investment. Always get a torch or heat supply with a greater capacity than you initially think you need. Remember that you can always reduce the amount of heat but you cannot increase it if the equipment is unable to supply the demand. Larger torches have the added advantage of being able to provide varying sizes of jet so that flame shape and size can be changed as necessary.

3) Miscellaneous tools such as a hacksaw and pliers are also recommended for the metal work restorer. An assortment of files and an electric soldering iron are also useful. It is important to obtain a jeweller's frame saw, which is probably the most important metal-cutting tool to have in your arsenal.

Building up a comprehensive toolkit can literally take a lifetime but you do not have to spend a fortune on equipment to achieve good results. A toolkit comprising the basic items will allow you to carry out many of the more straightforward repairs, and you can add specialist tools as and when the need arises.

Antique Metalware Restoration - Tools Needed To Do a Good Job of It
Soldering Equipment

Flat Hdtv Bose Surround Sound System

Hard Drive Recovery Equipment

Today the world revolves around the computer. From homes and offices to schools, airports and hospitals, computers have become an integral and indispensable part of our daily lives.

Soldering Equipment

One of the foremost uses of computers is data storage. Data stored on the computer resides on a physical memory disk known as the hard drive that is a layer of magnetic disks. As people become increasingly dependant on computers, the risk of data loss also surfaces.

Soldering Equipment

Hard drive crashes are a common occurrence. They are classified into two categories -- logical and physical. While the logical aspect deals with failure of the file system and software, the physical aspect is related to some sort of electrical or shock damage to the disk. However, modern technology allows us to recover up to 80% of the lost data, thereby allaying some of the fear related to hard drive recovery.

Hard drive recovery, whether physical or logical, is a complex process and requires expert help in most cases. Special equipment and tools are necessary to carry out this process successfully. A functional computer with the necessary software is the primary equipment required for any hard drive recovery process. Data backup devices such as CD recorders, external hard drives and CD and DVD media are also used while recovering data from a damaged hard drive.

If the hard drive has suffered physical failure, proper electronic knowledge and equipment is a must. A soldering iron might prove useful when working on a damaged circuit board. Advanced tools such as magnetometers may also be used to physically extract lost bits from the magnetic media. These bits are used to rebuild a disk image.

In addition to the hands-on equipment required, certain other precautions must be taken. The hard drive, when removed, should be wrapped in anti-static material. The drive should be well cushioned to prevent further damage. Finally, the recovery process should take place in a ?Class 100 Clean Room? to avoid any contamination by dust.

Hard Drive Recovery Equipment
Soldering Equipment

26 Inch Hdtv Rare & Collectible Books

The Art of Brazing and Soldering

Two methods are deployed for the joining of metal. One is brazing. The other one is soldering. The processes are similar and use the same basic procedure. One of the differences between the two techniques is mainly that of temperature. Temperatures greater than 840°F are used for brazing. Soldering is done at lower temperatures. You will select certain tools according to whether you are brazing or soldering.

Soldering Equipment

The material being worked will dictate which method is necessary. Brazing is something you'd do with wrought iron wares. You might braze the wire frames of your sunglasses. Soldering is commonly used to work electronic components or to make jewelry. Soldering will not yield the same strength as brazing. Brazing is much stronger of a bond. The whole process can be done in six basic steps:

Soldering Equipment

1. Pre-fit the separate pieces that are to be joined. Inspect the seam for clearance and tight contours. For best results the joint clearance should be 0.15 inches. It's all about filler materials. If the joint is too big it will not fill properly. The same applies to the size of the joint that is too small. It is necessary to ensure all components are free from rust, oil and dirt.

2. Clean all of the materials thoroughly. The two sections must be clean to be joined properly. You can wipe it down using a clean cloth. Grease removing solvents will work best for removing grease and oil.

3. When brazing you will want to use flux. The compounds in the flux prohibit the metal from oxidizing after it is heated way up. Oxidation prevents filler materials from bonding properly.

4. Assemble the parts using clamps or stops in the exact configuration that it is to be permanently joined.

5. Braze the assembly together filling the joint all the way. Heat the separate pieces up first. Then apply the filler material. Capillary action will draw it into the gap to be filled.

6. Perform a final cleaning. Drop the piece in hot water to cool it. Finally brush off any flakes that have formed. Steel wool and mild solvent will clean it further.

The Art of Brazing and Soldering
Soldering Equipment

Proxima Projector Google Android 7 Tablet Wilton Cookie Molds

Stained Glass Construction - Leaded Vs Foiled

There are two ways to make stained glass, leaded or copper foiled. The major difference between the two is in the construction. With leaded, the glass is fitted into channels of lead came. In contrast, copper foiled, is constructed by wrapping each piece of glass with copper foil.

Soldering Equipment

Leaded stained glass historically is found in churches. It was during the Victoria Era where leaded  glass was introduced into homes and has remained a popular method of constructing stained glass ever since.

Soldering Equipment

Foiled glass was mastered by Tiffany in the early 1900's and soon after became a popular method for creating stained glass.

Common Questions:

Is one method better than the other?

The simple answer is no. A better answer is that it depends on the artist and the design.

What is the difference in leaded and foiled construction?

With leaded glass, the construction must begin at an outer corner, the individual pieces are fitted into lead came. Once all pieces are cut and placed in lead came, the joints of came are soldered. Then the piece is cemented.

With foiled glass, the construction can begin at any point in the design and worked out from there. The individual pieces are wrapped in copper foil and soldered together.

When is foiled stained glass construction better than lead?

With intricate designs, foiled construction is superior

When is lead construction better than foiled?

Leaded construction is used most often with designs that have repetitive geometric shapes. These designs can be foiled, but construction time is increased.

Which is easier?

There is no simple answer for this. It is really a personal preference. Leaded, foiled or combination of the two are used throughout the stained glass industry.

Is leaded or foiled construction better than the other?

No, each method, if done correctly, will provide the same long lasting beauty and endurance.

Why is foiled construction taught to beginners doing stained glass?

The cementing in leaded construction tends to be messy. Foiled construction can be started and stopped, making weekly classes work.

What are the steps for making leaded glass?

Glass is cut, shaped and fitted into channels of lead came. Joints of lead came are soldered. The piece is cemented The piece is cleaned and polished
What are the steps for making foiled glass?

Glass is cut and shaped, and then each piece is wrapped in copper foil. Copper foil seams are soldered together. The piece is cleaned and polished.
My Personal Choice:

I tend to do a lot of intricate designs, so I use the foiled construction method. It provides the flexibility and detail I need for my designs.

Stained Glass Construction - Leaded Vs Foiled
Soldering Equipment

Inflatable Outdoor Halloween Decorations Electric Hand Tools 2.5 Firewire Enclosure

Bring Focus To Your Stained Glass

Patinas are used to color or darken solder lines. The most common patina colors are black and copper. Using patinas brings the focus on the glass and the design of your stained glass piece. This makes the glass colors, textures and designs of the stained glass piece the main focus.

Soldering Equipment

Before you apply patinas, be sure all flux residues is removed. This can be done using a commercial flux remover or washing the stained glass piece with dish soap and baking soda.

Soldering Equipment

Steps for Applying Patinas

o Use a brush, rag or cotton ball to dab patina on to the zinc frame. Do not use a brushing action, as this can leave streaking or patchy coverage.

o Next, apply patina to solder lines. Be sure all edges of solder lines have been covered.

o Then, turn project over and repeat the process on that side.

o Lastly, thoroughly rinse the patina off the stained glass piece. After it is completely dry, a minimum of 24hours, finishing compound can be applied.

Tips and techniques for Applying Patinas

o Safety - Always wear rubber gloves when applying patina.

o If patina appears spotty, use super fine steel wool to clean the area, and then re-apply the patina.

o To avoid oxidation, clean and apply patina immediately after project is soldered.

While patina will mask some inconsistencies in you solder lines, others will still be noticeable and take away from the professional look of your piece. With patience, practice and the correct tools and supplies, you can have professional solder lines.

Most patinas come in an 8 oz bottle. Avoid contaminating the liquid in the bottle by never re-dipping your applicator back into the bottle. Pour out a lid full and use this as your re-dip point.

You may experience different end results with the use of different brands of patinas. One common brand and easily found on store shelves and on line is Novacan. It is available in different formulas for different metals i.e. lead vs. zinc. As you experiment with different brands, you will notice that the more expensive ones do seem to shine more. Sometimes simple wax and compound can help this situation too.

Usually, if need be, patinas can be removed by using steel wool and some elbow grease. So don't fret if you think the application has made your art work look bad or if you just don't like the shiny lines dark.

I was not a fan of most patinas; however, I now know that by using this product, you do experience brilliant colorful glass. All attention is quickly turned from solder lines to the subject of your glass creation - the glass.

Another note of concern applies to patinas as well as other chemicals used in stained glass production. That is evaporation. Be sure and keep the lids tightly screwed on your bottles of supplies as some do seem to disappear into thin air. This will also avoid waste if tipped over accidentally.

Bring Focus To Your Stained Glass
Soldering Equipment

Home Audio Video Systems Slide Projector Bulb

Sinometer 30 Watts Soldering Iron, UL listed

Black Friday Sinometer 30 Watts Soldering Iron, UL listed 2011 Deals

Nov 24, 2011 00:08:33

Black Friday Sinometer 30 Watts Soldering Iron, UL listed Deals
Click for larger image and other views

Sinometer 30 Watts Soldering Iron, UL listed

>> Click here to update Black Friday prices for Sinometer 30 Watts Soldering Iron, UL listed <<

Black Friday Sinometer 30 Watts Soldering Iron, UL listed Feature

  • Long life replaceable tip
  • 30 Watts and UL listed
  • Stand included
  • Impact resistance handle
  • 30 days money back guarantee and 1 year limited warranty


Black Friday Sinometer 30 Watts Soldering Iron, UL listed Overview

This professional 30 watt soldering iron features a replaceable tip, ergonomically designed cool grip rubber handle, and a nickel-iron plated long life copper tip. It provides an operating tip temperature of up to 430 F with fast heating time and quick heating recovery. 120 VAC.


SAVE NOW on Black Friday offers below!

Available In Stock.

This Black Friday Sinometer 30 Watts Soldering Iron, UL listed ships for FREE with Super Saver Shipping.

Price : Click to Check Update Prices Please.

Sinometer 30 Watts Soldering Iron, UL listed

Limited Offer Today!! Sinometer 30 Watts Soldering Iron, UL listed Black Friday and Cyber Monday 2011 Deals

Wd Tv Mini Syntha 6 Protein Powder

Home Solar Power Made Easy

Solar power has been scoffed at in the past. The scoffers admit there is an abundant supply of energy coming from the sun but then add that the cost to harness that power is far too expensive. But the wonderful thing about technology is that it keeps changing and it keeps getting better and better. Now, instead of having to buy an expensive solar panel and all the equipment you need to reduce your electric bill every month, you can actually make your own solar panel system at home. As a matter of fact, it is possible for your entire residence to be completely free from the power company just by implementing solar into your home.

Soldering Equipment

As the title of this article suggests, solar power at home can be easy. There are many things that attract the light and heat of the sun like metal, glass, and mirrors. These materials can be used to not just draw in the power of the sun but to hold onto it as well and transfer that energy to a battery. Even a simple car battery can be used to hold the power generated by your solar power system.

Soldering Equipment

Do-it-yourself solar power programs do not have to be difficult. As long as you can read and follow instructions you can be on your way to energy independence. And the great thing about solar power is that you can start small if you want and grow your solar power system as you feel the need. You probably want to get the basics of how solar works before you go all out, but when you start seeing the savings on your power bill you may reconsider and start adding on to your solar project.

It seems everything carries a cost these days, so it is nice to know that the sun's energy is still free and available. You may need to buy a few materials for your home solar system to work but a lot of it can be made from things lying around the house. The basic components of a solar panel will be solar cells, some solder, flux, a soldering iron, and tabbing.

In a short period of time you can be enjoying your homemade solar panel system and helping the environment at the same time. Solar power is being used in places of business and by large companies but now you can have it at home as well.

Home Solar Power Made Easy
Soldering Equipment

Black Friday Weller SPG80L Marksman 80 Watt Stained Glass Soldering Iron 2011 Deals

Nov 22, 2011 21:24:58

Black Friday Weller SPG80L Marksman 80 Watt Stained Glass Soldering Iron Deals
Click for larger image and other views

Weller SPG80L Marksman 80 Watt Stained Glass Soldering Iron

>> Click here to update Black Friday prices for Weller SPG80L Marksman 80 Watt Stained Glass Soldering Iron <<

Black Friday Weller SPG80L Marksman 80 Watt Stained Glass Soldering Iron Feature

  • Stainless steel barrel and heat and impact resistant handle.
  • Indicator light allows you to instantly see that the iron is on.


Black Friday Weller SPG80L Marksman 80 Watt Stained Glass Soldering Iron Overview

Non-Temperature Controlled; 80 W; Temperature Range: 900 Deg. F; Cord Length: 6 ft.


SAVE NOW on Black Friday offers below!

Available In Stock.

This Black Friday Weller SPG80L Marksman 80 Watt Stained Glass Soldering Iron ships for FREE with Super Saver Shipping.

Price : Click to Check Update Prices Please.

Weller SPG80L Marksman 80 Watt Stained Glass Soldering Iron

Limited Offer Today!! Weller SPG80L Marksman 80 Watt Stained Glass Soldering Iron Black Friday and Cyber Monday 2011 Deals

15 Inch Touchscreen

How To Connect A Washing Machine or Dishwasher

This is a pretty easy job for any keen DIY enthusiast as all you need is to connect the water supply going into the machine and the drainage for the water coming out of the machine. So the first thing you should consider is the placement of the machine - Next to the sink is ideal as it gives you easy access to existing supplies and drainage.

Soldering Equipment

Connecting The Water Supply Machines either have a Hot & Cold feed or just a cold feed ( most dishwashers just have a cold feed ) Subject to satisfactory water pressure ( check your manual ) most machines are designed to run straight from the mains water pressure - you may have problems if you have a short vertical run from a water tank supply. Washing machines and dishwashers have standard fittings ( which should be supplies with the machine ) and use ¾ inch BSP flexible hose or hoses.

Soldering Equipment

First of all you need to fit an inline valve for the hose to connect to - this is so the supply can be isolated when required. When connecting to the mains an inline valve with a Check Valve incorporated into it should be used for connection directly into the mains - this prevents any flow back of water.

The inline valves are pretty standard for connecting to 15mm copper pipe and come in various styles These are compression fitting valves - a straight, an elbow and a Tee. With Red or Blue control knobs for either hot or cold water supply.

You could also use a push on valve or a self cutting valve.

The Pipe Work

The Pipes need to be run close to the washing machine or dishwasher so that the hose / hoses can be fitted without being pulled tight - ideally forming a slight loop. The hoses are usually supplied in a 1.5 metre length. Disconnect the water supply and drain down then connect the pipework where required - make sure you have a bucket and cloths to hand because there may well be some water left in the pipes. If the existing pipe work has compression fittings then just disconnect these and add the extra pipe using new compression fittings such as a tee fitting. This can often be done without the need for cutting pipes. If your existing joints are solder joints then you will need to cut the pipe to insert your required fitting. Make sure that if you are using solder joints again then the water level is well below the level of the joint you are soldering so a good solder seal is made and that the taps are left open so no steam builds up - or you can simply use a compression or push fit fitting. If your pipe work has push fit couplings then these can be easily be taken apart and the pipework usually re-used to make up the new pipe work - just changing your coupling to a Tee. Make sure the new pipe work is secured to the wall with pipe clips - making sure your new valves are securely held in place.

Waste Water Drainage Using Your Sink Waste Trap

If your washing machine or dishwasher is positioned close to your sink then you might be able to use your existing sink waste trap to plumb into - you may well be able to plumb the waste water hose straight into the side or top of the trap ( depending on what type of sink trap you have ) or you may be able to change your existing trap to one that would accommodate the hose as shown in the picture below. If you have to change the existing trap then make sure that you do not use a trap where the spigot for the waste water is in the bend as this can case the machine water to be siphoned out of the machine - But do make sure that the top of the waste hose is higher than the waste water trap - a screw in the wall at an appropriate place can sort this out.

Using a Dedicated Waste Water Outlet.

If your machine is too far from an existing trap then you will have to make a dedicated outlet. This is a vertical pipe with the water trap at the bottom of the pipe - you will then need to connect this to your existing foul water system - this is the same as your sink, bath and toilet water drainage. It can not simply be fed into a rain water soakaway.

How To Connect A Washing Machine or Dishwasher
Soldering Equipment

Black Friday Weller WP35 35-Watt Professional Soldering Iron 2011 Deals

Nov 21, 2011 19:17:45

Black Friday Weller WP35 35-Watt Professional Soldering Iron Deals
Click for larger image and other views

Weller WP35 35-Watt Professional Soldering Iron

>> Click here to update Black Friday prices for Weller WP35 35-Watt Professional Soldering Iron <<

Black Friday Weller WP35 35-Watt Professional Soldering Iron Feature

  • Ideal For A Wide Variety Of Electronic Tasks
  • Uses St Series Long Life Double-Coated Iron-Plated Tips
  • Tip Temperature: 850°F
  • Quick-Change Knurled Collar and Stainless-Steel Barrel
  • Light Blue With Cushion Grip Handle and Plug-In Heating Element


Black Friday Weller WP35 35-Watt Professional Soldering Iron Overview

Product Features: # Ideal for a wide variety of electronic tasks - has ST3 soldering tip # Uses ST series long life double-coated iron-plated tips # Tip temperature: 850°F # Quick change knurled collar - stainless steel barrel # Light blue with cushion grip handle and plug-in heating element # 6' 3-wire cord - iron is 7 7/8 long # IMPORTANT: Use only Weller® tips # UL and cUL listed (120 VAC units only)


SAVE NOW on Black Friday offers below!

Available In Stock.

This Black Friday Weller WP35 35-Watt Professional Soldering Iron ships for FREE with Super Saver Shipping.

Price : Click to Check Update Prices Please.

Weller WP35 35-Watt Professional Soldering Iron

Limited Offer Today!! Weller WP35 35-Watt Professional Soldering Iron Black Friday and Cyber Monday 2011 Deals

Food Supplement Flat Bench Sony Surround Systems

PS3 Yellow Light of Death Fix for Anyone

A PS3 yellow light of death is an indication of a major hardware malfunction. There are two main pieces within your play station that can have issues and cause the PS3 YLOD, the method you will need to use will depend on what exactly failed. The most common failures are in the power supply or the motherboard. As a rule, it is the solder joints on the motherboard that are the problem. Solder is the silver looking substance on electronic equipment that is used to keep tiny wires attached to circuit boards.

Soldering Equipment

In two of the PS3 models, 20GB and 60GB respectively the problem seems to be overheating. While these are definitely not the only models with issues, they are the most commonly affected. Inside the unit, the many processes going on generate heat, and many times the internal fans just cannot keep the interior cool enough, which leads to pooling of the solder. Basically that just means it has returned to a liquid state and leaves wires and tiny circuits exposed to dust, debris and vulnerable to vibrations.

Soldering Equipment

A PS3 yellow light of death fix can be as simple as using a heat gun to re-melt the solder and cover the exposed circuitry. You need to be very careful with this fix because if you use too much heat on the board you can scorch it rendering it useless.

If your issue is a power supply short or failure you will need to order a new power supply or get one used from a broken game system. In some cases a simple fuse or resistor replacement is all you need to be back in the game and that is a fix compared to the 0 or more Sony will charge you if you are out of guarantees.

PS3 Yellow Light of Death Fix for Anyone
Soldering Equipment

Black Friday Weller SPG80L Marksman 80 Watt Stained Glass Soldering Iron 2011 Deals

Nov 20, 2011 18:54:25

Black Friday Weller SPG80L Marksman 80 Watt Stained Glass Soldering Iron Deals
Click for larger image and other views

Weller SPG80L Marksman 80 Watt Stained Glass Soldering Iron

>> Click here to update Black Friday prices for Weller SPG80L Marksman 80 Watt Stained Glass Soldering Iron <<

Black Friday Weller SPG80L Marksman 80 Watt Stained Glass Soldering Iron Feature

  • Stainless steel barrel and heat and impact resistant handle.
  • Indicator light allows you to instantly see that the iron is on.


Black Friday Weller SPG80L Marksman 80 Watt Stained Glass Soldering Iron Overview

Non-Temperature Controlled; 80 W; Temperature Range: 900 Deg. F; Cord Length: 6 ft.


SAVE NOW on Black Friday offers below!

Available In Stock.

This Black Friday Weller SPG80L Marksman 80 Watt Stained Glass Soldering Iron ships for FREE with Super Saver Shipping.

Price : Click to Check Update Prices Please.

Weller SPG80L Marksman 80 Watt Stained Glass Soldering Iron

Limited Offer Today!! Weller SPG80L Marksman 80 Watt Stained Glass Soldering Iron Black Friday and Cyber Monday 2011 Deals

3M Pocket Projector

Aviation Electrical Wire

Aircraft service imposes severe environmental conditions on electric wire. To assure satisfactory service, inspect the wire at regular intervals for abrasions, defective insulation, condition of terminal posts, and buildup of corrosion under or around swaged terminals. When replacing copper wire with aluminium wire, increase the gauge of the wire two sizes.

Soldering Equipment

Voltage Drop in Electrical Wire.

Soldering Equipment

The voltage drop in the main power wires from the generation source or the battery to the bus should not exceed 2 percent of the regulated voltage, when the generator is carrying rated current or the battery is being discharged at the 5-minute rate.

Resistance.

The resistance of the current return path through the aircraft structure is always considered negligible. However, this is based on the assumption that adequate bonding of the structure or a special electric current return path has been provided which is capable of carrying the required electric current with a negligible voltage drop. A resistance measurement of.005 ohms from ground point of the generator or battery to ground terminal of any electrical device may be considered satisfactory. Another satisfactory method of determining circuit resistance is to check the voltage drop across the circuit. If the voltage drop does not exceed the limit established by the aircraft or product manufacturer, the resistance value for the circuit may be considered satisfactory. When using the voltage drop method of checking a circuit, maintain the input voltage at a constant value.
It should be noted that the No. 14 wire should not be used if any portion of its 100-foot length is to be confined in conduit, large bundles, or locations of high ambient temperature.

Aircraft electrical wire or aircraft quality wire.

Correct wire selection is dependent upon knowledge of current requirements, operating temperatures, and environmental conditions involved in the particular installation. Copper conductors are coated to prevent oxidation and to facilitate soldering. Tinned copper wire or aluminium wire is generally used in installations where operating temperatures do not exceed 221* F. (105* C.). Silvercoated copper wire is used where temperatures do not exceed 392* F. (200* Nickel-coated copper wire is used for temperatures up to 500* F. (260* C.). Nickel-coated wire is more difficult to solder than tinned or silver-coated wire, but with proper techniques, satisfactory connections can be made.

Electrical cable Insulation.

Polyvinylchloride (PVC) is a common insulation, used as PVC cable sleeving competing with Vidaflex cable sleeving and PTFE sleeving. It has good insulating properties and is self-extinguishing after the flame source is removed. Normal operating temperatures are limited to 221* F. (105* C.). Silicone rubber is rated at 392* F. (200* C.), is highly flexible, and self-extinguishing except in vertical runs. PTFE sleeving Fluorocarbon (polytetra-fluoroethylene) is widely used as high-temperature insulation. It will not burn, but will vaporize when exposed to flame. It is resistant to most fluids. FEP cable Fluorocarbon (fluorinated ethylene propolene) is rated at 392° F. (200° C.) but will melt at higher temperatures. Other properties of FEP are similar to TFE.

Thermal and Abrasion Resistant Materials.

Glass braid has good thermal and abrasion qualities but moisture absorption is high. Asbestos and other minerals provide high temperature and flame resistance, but are highly absorbent. Moisture absorption is reduced by use of silicone rubber, TFE, or other saturants. Nylon is widely used in low-temperature wires for abrasion and fluid resistance. Polyimide, a new material, has excellent thermal and abrasion resistant characteristics.

Electrical wire selection.

Select wire for structural and environmental characteristics. Wire normally used for chassis wiring, in enclosed areas, or in compact wire harnesses protected by moulded or braided coverings usually has low abrasion resistance. Wire used to interconnect units, or in long, open runs as airframe wire, is designed to withstand normal aircraft environment without sleeving, jacketing, or other protection. Care must be taken in making all installations because no wire insulation or jacketing will withstand continuous scuffing or abrasion.

In order to select the correct size of electric wire for equipment, two major requirements must be met:

(1) The size must be sufficient to prevent an excessive voltage drop while carrying the required current over the required distance.

(2) The size must be sufficient to prevent overheating of the wire while carrying the required current.

For the selection of wire we must know:

(1) the length in feet of the actual wire "run" from the bus to the equipment;

(2) the number of amperes of current it must carry;

(3) the amount of voltage drop permitted; and

(4) whether the current carried will be intermittent (maximum 2 minutes) or continuous, and if continuous, whether it is a single wire in free air, in a conduit, or in a bundle.

Assume that we wish to install a 50-foot length of wire from the bus to the equipment in a 28-volt system. We are permitted a 1-volt drop for continuous operation.

Aviation Electrical Wire
Soldering Equipment

2.5 Enclosure Sata Home Theater System Blu Ray 37 In Lcd Hdtv

Stained Glass Equipment

Glass equipment as an artwork was known to people since times. The popularity of stained glass was revived in the 1960s. The stained glass art and equipment was earlier confined to decorating churches, state owned buildings and few residences. From 1960 onwards, stained glass came to be extensively used for making jewelry boxes, mirrors, wall sconces, windows and other decorations.

Soldering Equipment

Every form of art and craft requires some kind of investment in special tools or equipment. Some basic equipment needs to be used for making stained crafts in glass too. The everyday tools used at homes like scissors and pliers can also be put to use. However, using the proper kind of equipment will produce a better stained glass art. Poor quality of tools can lead to irritation and abandonment of the project. It would be good to use the below mentioned stained glass equipment.

Soldering Equipment

It is advisable for beginners not to initially invest a lot on the stained glass equipment. A specially designed, unusual pair of pattern shears will be needed for making the craft. This can be bought for twenty dollars and above. Cheaper, twenty-five cent substitute, razor blades can also be used. Regular household scissors can also serve the purpose for amateurs.

As the artwork skills turn profitable, better stained glass equipment can be bought and used. Moving on with the basic list, soldering iron with an iron cased tip would be an important tool. Soldering iron can be found in any local hardware store or depot. Its price varies from ten to fourteen dollars. It is suggested not to buy a cheap soldering iron as they do not heat uniformly and do not last longer. Those who are seriously committed to make a stained glass work can buy a 100 to 150 watt soldering iron.

The temperature of the soldering iron should be controlled by a dimmer or a resistor. It prevents the iron from getting overheated. Such a rheostat unit can also be purchased separately to plug-in the soldering iron for use. Another necessary supply is the glass cutter. It is relatively cheaper, priced from three dollars and above. You can buy two different shaped cutters. When not in use, glass cutters soaked in kerosene or oil remain lubricated and reduce friction.

A basic glazing knife is used for various purposes while crafting a stained art glass. It is used to shape the edges of the glass or the lead. Grozing pliers with sleek and narrow jaw saves your fingers while working on delicate glass and glass breaks. A lead stretcher or any other vise, except wood or pipe vises, help to hold the lead strip for stretching. It is more flexible and bends easily along the edges of the stained glass pieces.

Among the equipment, flux is a chemical to clean the copper foil or lead vise when preparing for soldering the stained glass. When buying the most essential supplies for the craft, the glass itself, you can visit a crafts shop that sells glass. It can also be shipped or ordered by mail from a specific glass manufacturer.

Stained art glass is priced higher than normal glass used for windows. When bought in bulk, it can cost you less. Prices range from four dollars for a square foot and higher depending on size and quality. Glass equipment also includes solder, drawing paper and carbon paper. Solder can be bought from any hardware store for less than two dollars a spool which would be sufficient. Drawing and carbon papers can be used for sketching the artwork patters for glass.

Use goggles and gloves for protecting you eyes and hands. Assemble all the equipment in your work area or a safe place out of kids reach. Using the proper tools, creativity and dedication, stained glass proves to be a profitable hobby.

Stained Glass Equipment
Soldering Equipment

Protein Diet

Types of Welding

When you think about welding you might think that there is only one type of welding This is a common idea because most people only see the finished product. However, there are many different types of welding that you might find interesting.

Soldering Equipment

Welding is a way of joining metals to each other to make them firm and the metal forms a bond that is tight. There are a variety of bonds that are done depending on the types of welding you use.

Soldering Equipment

Types of welding fit under categories as listed here:

Gas welding

This type of welding creates a flame from a burning gas and this creates the welding heat that is needed. You will see this in the following types of welding:

Propane torches - people use this when they want to sweat a joint or when they want to solder two pieces of metal together. This is one of the lowest heats and can be used for small things.

Oxyacetylene torch - this heat gets a bit hotter and many people say this is the most universal type of welding tool you can find. This is used when you need a very hot flame. This type of torch will weld a variety of things as long as you have the right metals and tools for it. It is generally used when you want to cut, braze, weld or solder something that requires a higher heat. You have to be careful though because it is a type of heat that can be difficult to control and it can sometimes overheat the area.

Oxy-propane - this type of welding is used when you want to solder, braze or heat something. This is a cheaper form of both of the types of welding that was first listed.

Arc welding

This type of welding creates the heat through the use of an electric arc. The types of welding that are done through this type of welding include:

Basic AC & DC arc welders - when you are looking for a way to weld either heavy gauge steel or cast iron this is the type of welding to use. It uses rods that you guide along the place to be weld and these are made of flux coated steel or other materials.

MIG (Metal Inert Gas) - this is a very quick way of welding and some say it is easier to do than regular arch welding It is done through the use of a DC arc and it uses filler metal that is used with a spool of thin wire. You use inert gas instead of flux. This is usually used with steal bodywork and is a good choice when you need to weld sheet metal.

TIG (Tungsten Inert Gas) - this type of welding uses an AC arc that is of high frequency and it is combined with a tungsten electrode that is shielded by inert gas. This comes together to create a torch that is controllable. This is a good choice to weld very thin metals together. If you are working with aluminum or stainless steel this is a good choice.

Types of Welding
Soldering Equipment

Epson Document Camera

5 Steps to Build Your Own Home Solar System

1) Do a complete energy audit - Before you begin any residential solar power project, you should do a home energy audit to find out how and where power is being used in your household. You want to know how much energy is being used monthly so you can design a solar system to suit your needs.

Soldering Equipment

By performing an energy audit, you will also find out if there's any power leaks at home and take steps to rectify it.

Soldering Equipment

2) Source for cheap components - If you want to keep your home solar project budget down, you have to do so leg work to source for cheap parts and components.

You begin by going through eBay inventory. The inexpensive components that you want to look for are solar cells and deep cycle batteries. Spend some time going through the offers and place your bidding.

3) Build the solar module - When you have gotten the solar cells from eBay, most probably they are not in the best condition. You have to check each and every cell.

Broken cells can be discarded. Cracked cells can be repaired. When you have sorted all the PV cells, you can start to solder them together to make the solar panel.

4) Installing the solar module - At this stage, you have to decide how and where you want to install the solar panels. The modules can be setup either on the roof or on the ground. Roof installation is a better option because it has the most sun exposure.

5) Building the battery bank - You cannot connect an electrical equipment directly to the solar panels. This is because the power output from the modules is small and inconsistent. You need to build a battery bank.

The solar cells are connected to a controller where it will be used to charge up the battery. When the battery is charged, it can be used to power simple electrical equipment with Direct Current (DC).

If you want to power your stereo, TV or computer, you will have to use a power inverter to change the DC to AC (Alternate Current).

5 Steps to Build Your Own Home Solar System
Soldering Equipment

Black Friday Weller D550PK 120-volt Professional Soldering Gun Kit 260/200 Watts 2011 Deals

Nov 16, 2011 16:03:57

Black Friday Weller D550PK 120-volt Professional Soldering Gun Kit 260/200 Watts Deals
Click for larger image and other views

Weller D550PK 120-volt Professional Soldering Gun Kit 260/200 Watts

>> Click here to update Black Friday prices for Weller D550PK 120-volt Professional Soldering Gun Kit 260/200 Watts <<

Black Friday Weller D550PK 120-volt Professional Soldering Gun Kit 260/200 Watts Feature

  • Fingertip trigger selects high (260-watts) or low (200-watts) for controlled output
  • Designed with pistol grip for comfort and ease of use
  • Features twin lights to illuminate your work
  • Heats up quickly; ready to use in only 6 seconds
  • Includes an assortment of accessories in a molded plastic storage case


Black Friday Weller D550PK 120-volt Professional Soldering Gun Kit 260/200 Watts Overview

Soldering Gun Kit 260/200W Soldering Gun With Tin Plated Copper Tip 2 Untinned Tips fluxbrush Soldering Aid Tool Coil 40/60 Rosin Core Solder Plastic Carry Case Soldering Hints Booklet.


SAVE NOW on Black Friday offers below!

Available In Stock.

This Black Friday Weller D550PK 120-volt Professional Soldering Gun Kit 260/200 Watts ships for FREE with Super Saver Shipping.

Price : Click to Check Update Prices Please.

Weller D550PK 120-volt Professional Soldering Gun Kit 260/200 Watts

Limited Offer Today!! Weller D550PK 120-volt Professional Soldering Gun Kit 260/200 Watts Black Friday and Cyber Monday 2011 Deals

Gaming Keyboard

Computer Parts, Used and Refurbished - A Smart Buyer's Guide

Microsoft, Intel, Sun, HP and all those businesses devoted to selling you new hardware depend for their livelihood on convincing you that you simply have to have the latest and greatest version of their wares. But truth be told for many of us, our trusty old equipment will do just fine, thank you.

Soldering Equipment

This is even more the case with regard to enterprise level components: servers, routers, storage devices etc. Many companies have invested tens of thousands -- even millions -- of dollars in proprietary software which is critical to their businesses and which will not function on newer model hardware. Moving to a new generation of equipment for these companies often means undertaking a complete revision of software and processes -- an expensive and perilous undertaking. Maintaining perfectly good equipment with a small investment in parts often presents the best value, so it's not surprising therefore that many companies choose instead to keep their legacy equipment chugging along as long as possible.

Soldering Equipment

As a result, a whole industry has developed catering to the used, refurbished and unused parts and components markets for equipment originally manufactured by companies such as Digital Equipment (later to become Compaq and later still to be absorbed by Hewlett Packard), Sun Microsystems, Cisco and Enterasys (formerly Cabletron) and many others. Buying used and refurbished parts can result in significant savings.

Thanks to the internet it is now easier than ever to find suppliers for old and even obsolete computer parts. And it should also surprise no one that the temptation to fob off counterfeit parts as genuine is too great for some to resist.

So, how do you know when you are getting genuine parts for your legacy machine? Here are a few pointers provided by Pyramid Technology Services, a well known and highly reputable used and refurbished computer parts dealer with many years of experience and a large inventory of refurbished parts, on how to identify counterfeit Cisco parts:

Look at the color of the serial number. Cisco's own color is a yellow-orange; counterfeits are darker. The numbers may appear crowded and even rub off on the phony items LEDs on blades. They should all be the same size. Watch the color on loop-back buttons on WAN interface cards: it should be dull, not bright red. Real Cisco boards usually have solder points covered with nickel-zinc, not copper, as seen on counterfeits. Inside the RJ-45 connector, Cisco parts will have the word "Steward," not "GLG." Always deal with a well-established value added reseller. Look for a dealer who rigorously tests everything and who backs up sales with a warranty. Stick with sellers who belong to the ASCDI (the Association of Service and Computer Dealers International). They have an established code of ethics and an arbitration procedure in place for any problems that might arise.

Computer Parts, Used and Refurbished - A Smart Buyer's Guide
Soldering Equipment

Black Friday Weller WPA2 Pyropen Professional Self-Igniting Cordless Butane Soldering Iron 2011 Deals

Nov 15, 2011 16:38:20

Black Friday Weller WPA2 Pyropen Professional Self-Igniting Cordless Butane Soldering Iron Deals
Click for larger image and other views

Weller WPA2 Pyropen Professional Self-Igniting Cordless Butane Soldering Iron

>> Click here to update Black Friday prices for Weller WPA2 Pyropen Professional Self-Igniting Cordless Butane Soldering Iron <<

Black Friday Weller WPA2 Pyropen Professional Self-Igniting Cordless Butane Soldering Iron Feature

  • Ignites with the push of a button
  • Completely portable and ready to use in 30 seconds
  • Sturdy metal tank holds enough butane gas for 3 hours of operation
  • Does not require cords, batteries, or cartridges
  • Temperature adjusts from 482 Degree F to 932 Degree F


Black Friday Weller WPA2 Pyropen Professional Self-Igniting Cordless Butane Soldering Iron Overview

Ignites with a push of a button. Lightweight and completely portable. Ready to use in 30 seconds. Sturdy metal tank holds enough gas for 3 hours of operation. Does not require cords, batteries or cartridges.


SAVE NOW on Black Friday offers below!

Available In Stock.

This Black Friday Weller WPA2 Pyropen Professional Self-Igniting Cordless Butane Soldering Iron ships for FREE with Super Saver Shipping.

Price : Click to Check Update Prices Please.

Weller WPA2 Pyropen Professional Self-Igniting Cordless Butane Soldering Iron

Limited Offer Today!! Weller WPA2 Pyropen Professional Self-Igniting Cordless Butane Soldering Iron Black Friday and Cyber Monday 2011 Deals

Samsung Led 120Hz

Building Solar Panels - How Simple

Are you looking to build your own solar panels, probably because the cost of buying a solar panel is through the roof. A typical home uses 300 watts of power per day, and if you were to go and buy sufficient solar - panels to produce that amount you would need to spend close to ten thousand dollars. Now for a regular family throwing ten thousand dollars towards some solar panels is not a viable option.

Soldering Equipment

That is why I opted for building solar panels. I will show you want you need, and how to avoid costly mistakes. This seemed a little easier then out wind generator that took us a little while to assemble, but was still quite easy with the guide that we followed.

Soldering Equipment

What you need

- A guide - these are readily available on the net

- Some simple tools and a clean work place

- Make sure the guide is tested, and easy to follow - some guides are complicated and end up taking to much of your time and money

The guide that we used focused on installing solar - panels, but there was also a section that covered building your own. We set off and starting following their instructions to the letter. Some of the guides online even talk about how you can sometimes get solar panels for free, but we won't cover that.

First you need something to mount the solar cells on. Preferably a piece of plywood, you can use OSB material but plywood is more durable and last better in the weather. OSB will absorb the water when it rains and this can ruin your project. To build your own solar - panels you will need to do some soldering to get the appropriate tool.

Always wear safety equipment, when working

Basically building solar - panels is quite easy but you have to know where to get the solar panels. Once you have acquired the solar panels it's a matter of soldering the negative and positives wires to make a completed panel. Once you have done this you can mount the solar panel and run the wires. Depending on how much power you are supplying, you can either hook them up to run your washer and dryer, charge batteries, hook them up directly to your meter. You have a few different options but make sure to find a guide, and follow their instructions.

Let me tell you, its pretty cool to see my meter spinning the other way, yeah its taken some work but I now get checks from the electrical company, and I never have to worry about paying them again. Building solar - panels was a fun project.

Building Solar Panels - How Simple
Soldering Equipment

Electronic Earmuff All American Pressure Canner

How to Avoid the Red Ring of Death

So many XBox 360 owners have planned a lazy afternoon of gaming bliss with their favorite game only to experience an all too common event. They've pulled up the sofa, set out the refreshments, and switched on their XBox 360, just to see that their console displays three red lights on the front panel.

Soldering Equipment

What these players have experienced is known as the XBox 360 Ring of Death. It's the result of a design fault in the XBox 360 console that causes the machine to overheat and damage some of the connections between components. The console simply gets so hot that the solder on the main circuit board melts and flows away from the pins of certain chips. Without these connections, the XBox cannot operate properly, and displays the fault as the three red lights on the front panel.

Soldering Equipment

It is possible to avoid the red ring of death meltdown. Since it is caused by overheating, you should do a number of things to keep your XBox 360 cool. Here are five.

Place the XBox 360 in a well ventilated location. This is the key to keeping your console cool. Make sure there is plenty of room around the 360 so that heat can escape. Moving air is especially good for cooling. Keep the Xbox 360 out of direct sunlight. Direct sunlight can heat up your console adding to the thermal load that the heatsinks have to dissipate. You want to reduce this as much as possible. Do not stack the XBox 360 with other equipment. Don't stack your console with other audio/visual equipment. This equipment not only generates heat, it can suffocate your XBox preventing heat from escaping. If you must stack equipment because of space constraints, put the 360 on top of the stack. Do not put things on top of the XBox 360 when it is on. After you've put the game CD in the drive, don't put the case on the console. This will restrict airflow and prevent heat from escaping. Turn off your XBox 360 when not in use. Aside from being eco-friendly, a powered down console has a chance to cool off.Of course, you may be reading this because you have already experienced the Red Ring of Death. If that's the case, there is still hope. There are a few repair guides available that will step you through the process of fixing your XBox 360. These are good if you are out of warranty, and don't want to face an expensive repair bill.

How to Avoid the Red Ring of Death
Soldering Equipment

Black Friday Heavy Duty Soldering Iron Stand 2011 Deals

Nov 13, 2011 17:20:32

Black Friday Heavy Duty Soldering Iron Stand Deals
Click for larger image and other views

Heavy Duty Soldering Iron Stand

>> Click here to update Black Friday prices for Heavy Duty Soldering Iron Stand <<


Black Friday Heavy Duty Soldering Iron Stand Overview

Heavy duty stand features a weighted iron base, large sponge tray, and metal iron holder. Built to withstand everyday industrial use. Net weight: 1/2 lbs.


SAVE NOW on Black Friday offers below!

Available In Stock.

This Black Friday Heavy Duty Soldering Iron Stand ships for FREE with Super Saver Shipping.

Price : Click to Check Update Prices Please.

Heavy Duty Soldering Iron Stand

Limited Offer Today!! Heavy Duty Soldering Iron Stand Black Friday and Cyber Monday 2011 Deals

Strollers For Infants Tivo Network Adapter